This is probably my most favourite upcycle project to date. Would you believe I had no idea what I was going to do before I started? Not only that, I still had no idea half way through the project! All I knew for definite, was the paint colour that I wanted to use. After a bit of brainstorming and seeking for inspiration, I decided on using sample tiles and mixing some white cement. I really wanted to push the boundaries, and it turned out prettier than I thought.

BEFORE

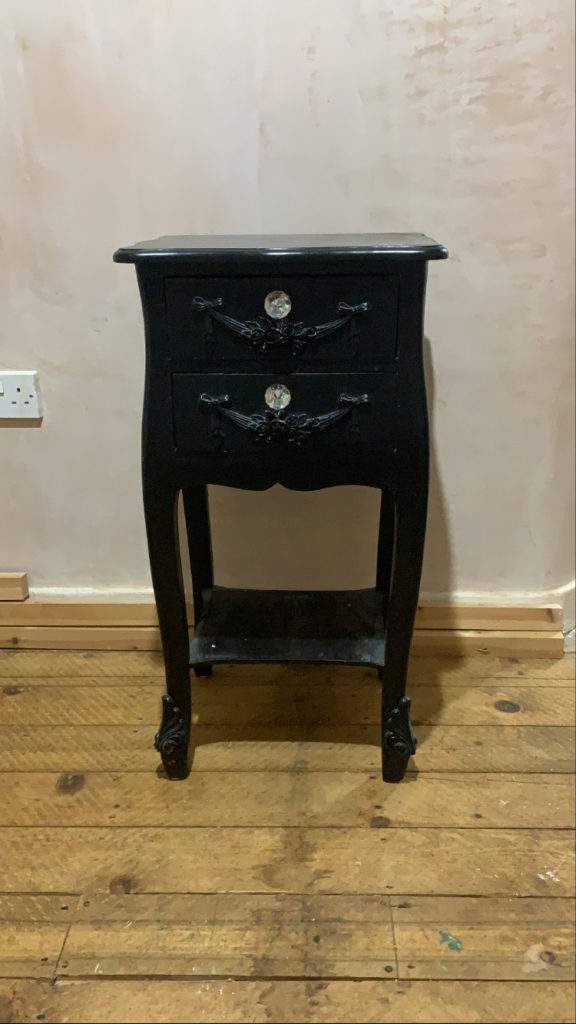
These were a pair of bedside tables that I bought many years ago from Dunelm, before I got married and before we had our house. I had a thing for french-style furniture, and had a lot of black in my teenage bedroom. Fast forward to now, and you won’t find any black in our interiors, so I needed to lighten them up to fit my new vision for our home.
STRIP IT
First thing was to strip the tables down and remove all of the added decals. This was actually simpler than I thought as they were made of a flexible moulded material. I used a chisel and a hammer and they came off pretty easily. I had crystal door knobs (which I loved at the time) but they really needed to go. I 100% wanted to add gold pull handles .
SQUARE IT UP
One thing you’ll find with French-styled furniture are the curved edges and feminine features, but I really wanted to square off the curves and add some harder edges. I used a fair few power tools on this project, but used a handsaw, jigsaw and circular saw to straighten everything up.

SAND IT DOWN
It is always important to key the surface of a piece of furniture before painting, which is basically creating a surface which the paint will adhere to easily. Thankfully for me, these bedside tables weren’t covered in a thick gloss paint or anything which would need to be stripped beforehand, so a light sand using a mouse sander and sanding block did the job.
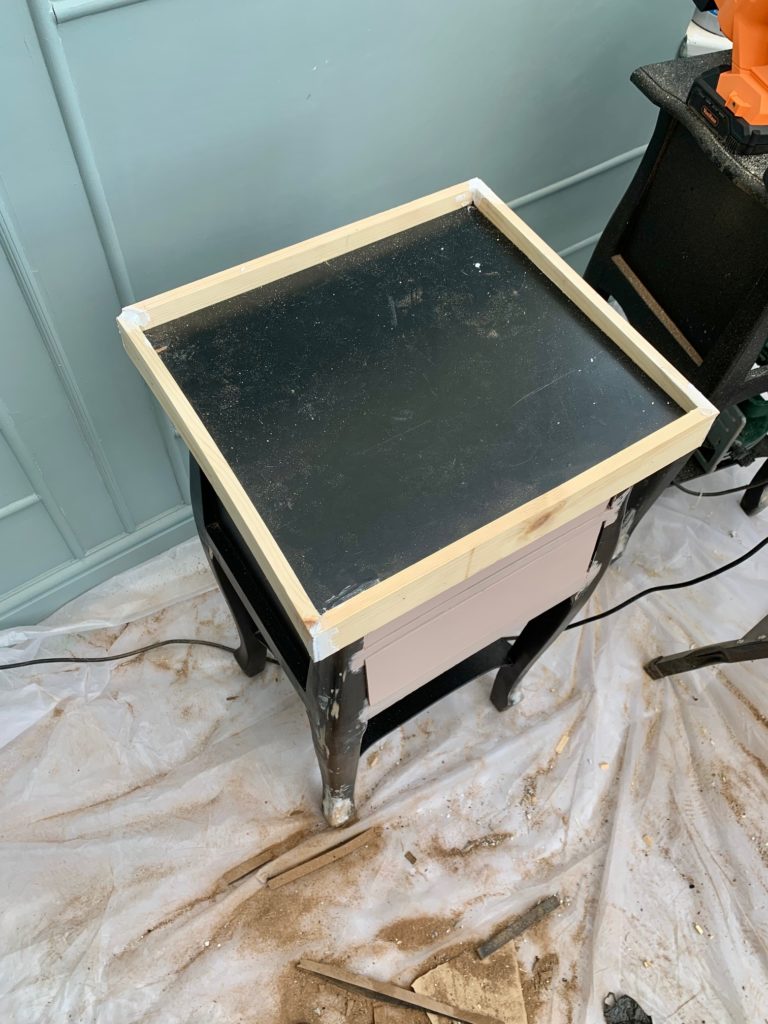
TABLE TOP FRAME
I really wanted to create a tray-like frame for the top of the table, for whichever design feature I decided to go for. At this point it was a choice of tiling, white cement or resin.
I used 10mm x 45mm pieces of timber to make the frame and joined them together with mitre joints (ends cut at a 45 degree angle and pieced together). For this part of the project, I used a mitre saw to cut the frame pieces and then a cordless nail gun to attach the frame to the table top. Once secure, I filled the gaps at the corners with wood filler, and sanded down once dry.
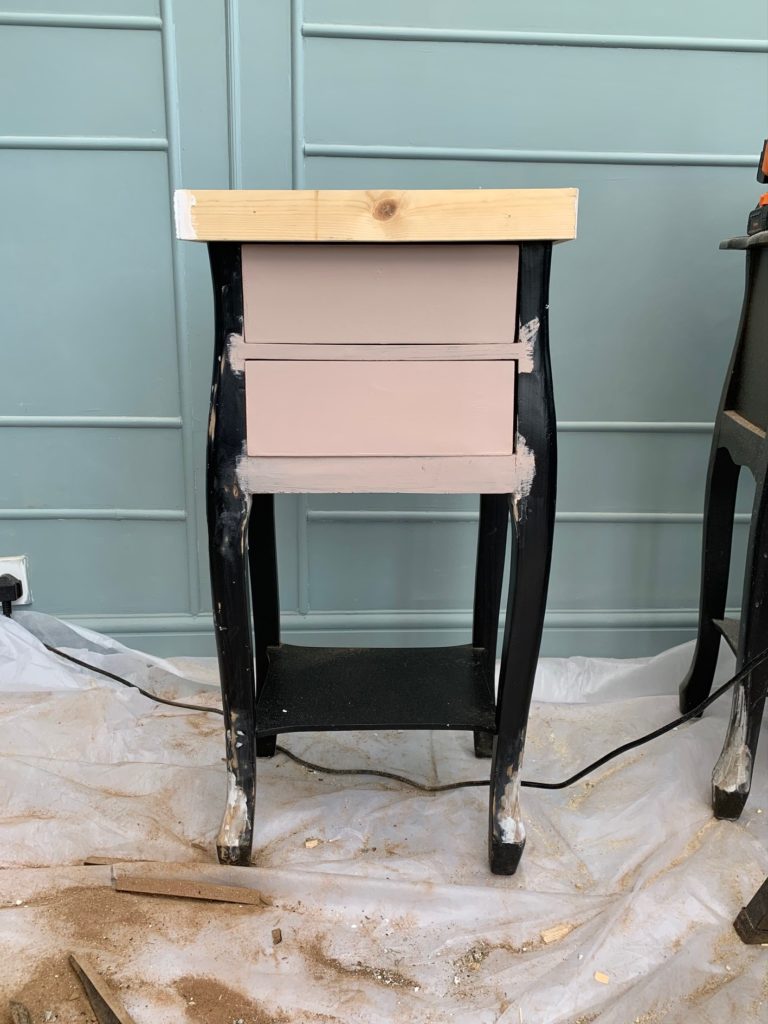
PAINT IT
The paint colour was the only thing I was certain about before starting this project. I had a tin of Frenchic Nougat paint, and I was totally sold on using it for these bedside tables.
To prep the tables, I cleaned it down with a sugar soap solution. This was so important, because the table was covered in sawdust, excess woodfiller and just a lot of dirt which would affect the finished look.
Once cleaned, I did 2 coats of the paint and left the table to dry. You may need to lightly sand in between coats to ensure a smooth finish.

TILE MOSAIC

This next part may have been the most fun… Smashing sample tiles.
I don’t know if you’re like me, but I had so many sample tiles lying around the house that my husband really wanted me to get rid of, but I knew that one day I wanted to use them for a project, and then I had this terrazzo mosaic idea and was so excited.
I laid the tiles flat on an old towel, folded the towel over the top of them, and used a hammer to break them up. Wrapping the tiles in a towel prevents the top of them from being damaged. Although you want them to be broken, you still need the colour, design and pattern to be intact
WHITE CEMENT MIX
Mixing cement wasn’t new to me, as I had to use it in our conservatory before laying the flooring down. However, it was my first time using white cement. White cement is used for more decorative purposes than an ordinary cement mortar. It is lighter in colour and used a lot in high-end construction.
For this, I had to mix white cement with natural sand at a ratio of 1:2. Once mixed together, I added water a cup at a time until the mixture was the consistency of cookie dough (pourable, but not too runny). Make sure you really incorporate the whole mixture when mixing, you want it all to be the same consistency throughout.
I quickly poured this mixture into the wooden frame table top and used a trowel to make sure it reached each corner evenly.
You have to be quick for this part… I placed and arranged the broken tiles into the cement mix. I didn’t have a plan for where the tiles would go, but had fun being creative with it.
I needed to pick the table up and give it a little shake every now and again to make sure the cement mix was level whilst I was adding the tiles.
When all the tiles were in place, I left overnight. Another good tip is to use a band clamp around the frame to make sure the cement mix doesn’t expand whilst drying.
Wait 24 hours for the cement to dry completely, and then use a cement/concrete sealer on the top to protect it.
VOILA
The finishing touch was to add the handles, and here it is, my white cement table top.
You can see the whole process over on my instagram @grizzle_abode in my ‘BEDSIDE TABLE’ highlight.
https://www.instagram.com/p/COpY-PdL1-w/

The materials I used:
- Frenchic Nougat paint
- Brass lip Handle- Plank Hardware
- “>Natural sand
- Blue Circle snowcrete white cement
- Lots of broken sample tiles
- Timber (10mm x 45mm)